|
Astronomy 161:
An Introduction to Solar System Astronomy
Prof. Richard Pogge
|
Supplement: Build Yourself a Simple Hand-Held Spectrograph

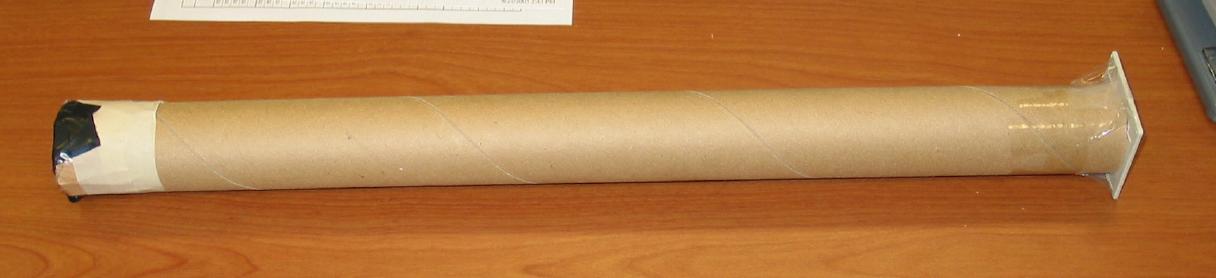
Completed "MkIV" Hand-Held Spectrograph
In class during Lecture 25, I mentioned
how I had constructed a simple hand-held spectrograph using one
of the diffraction grating slides and a cardboard tube, and then used
that to examine various light sources to determine how they worked.
Below is a set of instructions for how to construct your own
hand-held spectrograph.
WARNING!!!
NEVER, EVER POINT THE SPECTROGRAPH AT THE SUN!!!
THE SUN IS DANGEROUSLY BRIGHT, EVEN AT WAVELENGTHS YOU CAN'T
SEE, SO YOU COULD SERIOUSLY DAMAGE YOUR EYES.
Materials
The materials you'll need to make the simple spectrograph are
as follows. All are readily available.
- A 1.5-inch diameter cardboard tube. A small mailing tube works
best, but in a pinch the tube from an empty role of paper towels
will do. The thicker the walls the better, since it will make
for a sturdier spectrograph. I used a mailing tube that came with
a small poster, about 19-inches long.
- A roll of black masking tape or black electrical tape.
- A piece of holographic diffraction grating film mounted in a
2x2-inch slide. You can buy these from Edmund Scientific for about $10
for package of 15:
- scientificsonline.com (item #3054510)
- A thick 3x5 card
- A sheet of thick cardboard to use as a cutting pad.
- Some Tools:
- #2 pencil
- Sharp pair of scissors
- Metal straight-edge ruler
- Fine-blade xacto knife or other very sharp razor knife.
Assembly Instructions:
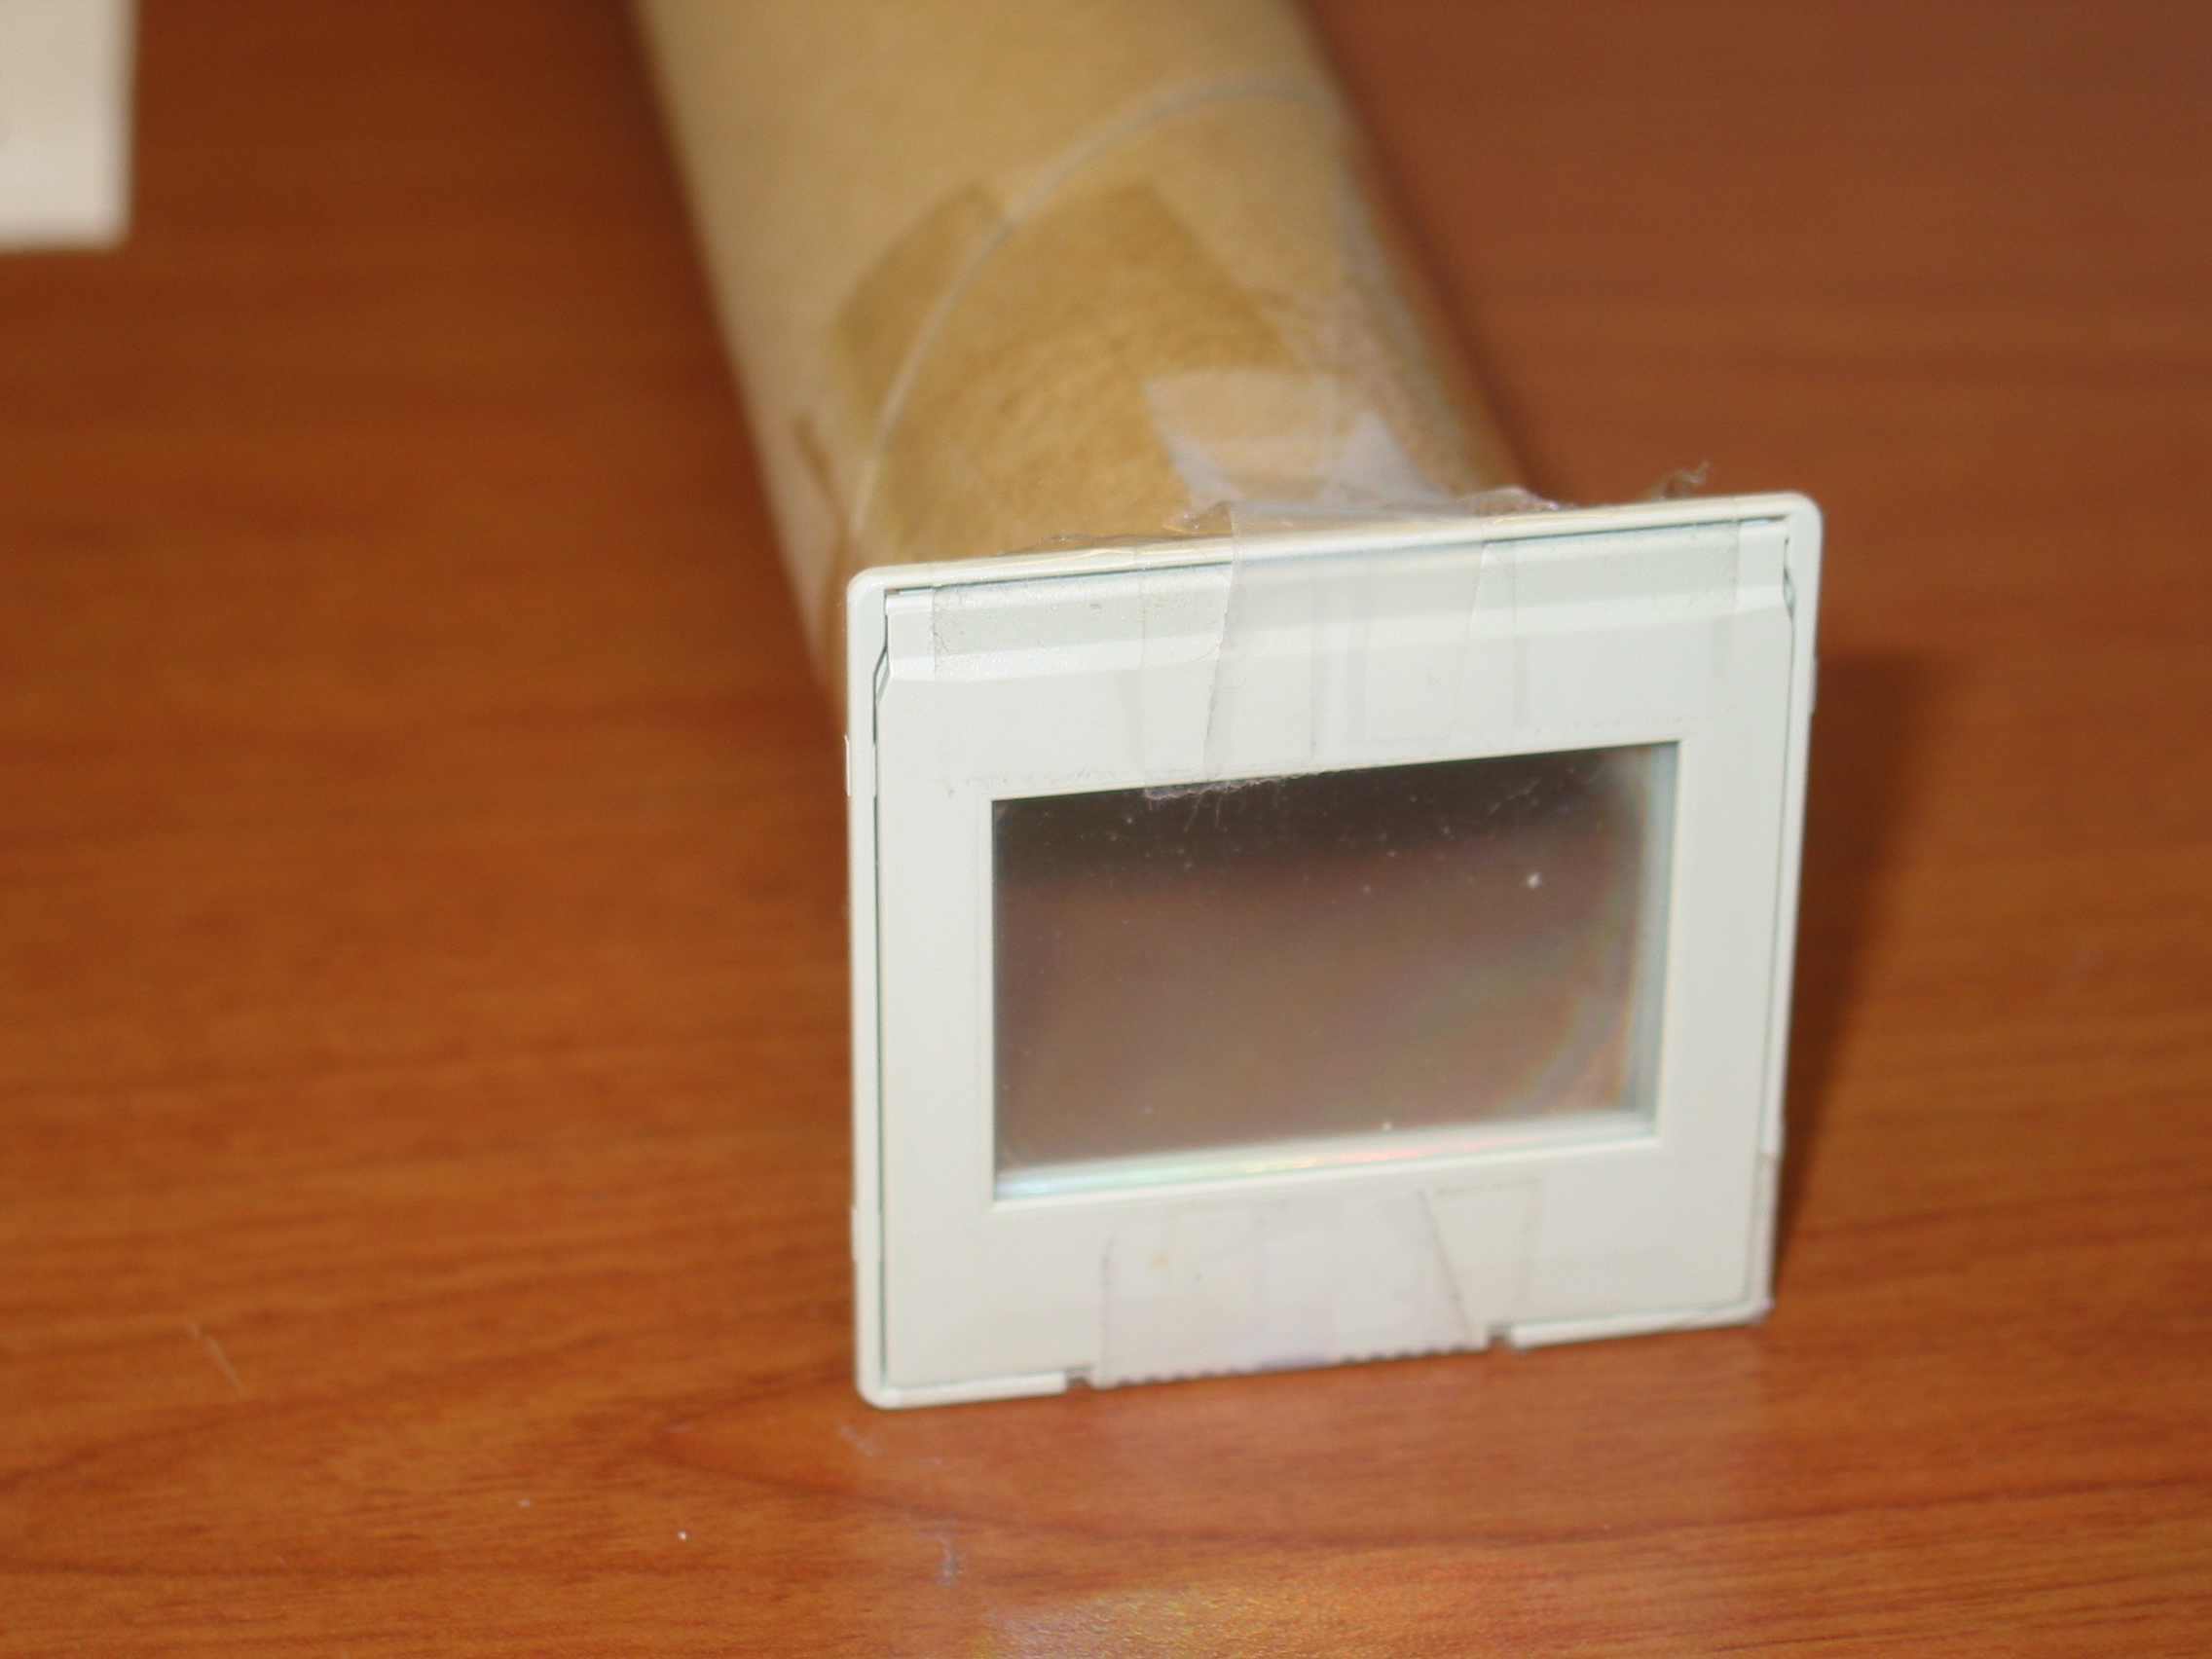
- Step 1
- Mount the grating on one end of the tube using tape. Note the
direction of the long axis of the grating, this defines the
"dispersion axis" of the system. The pictures below show
how the grating is mounted:


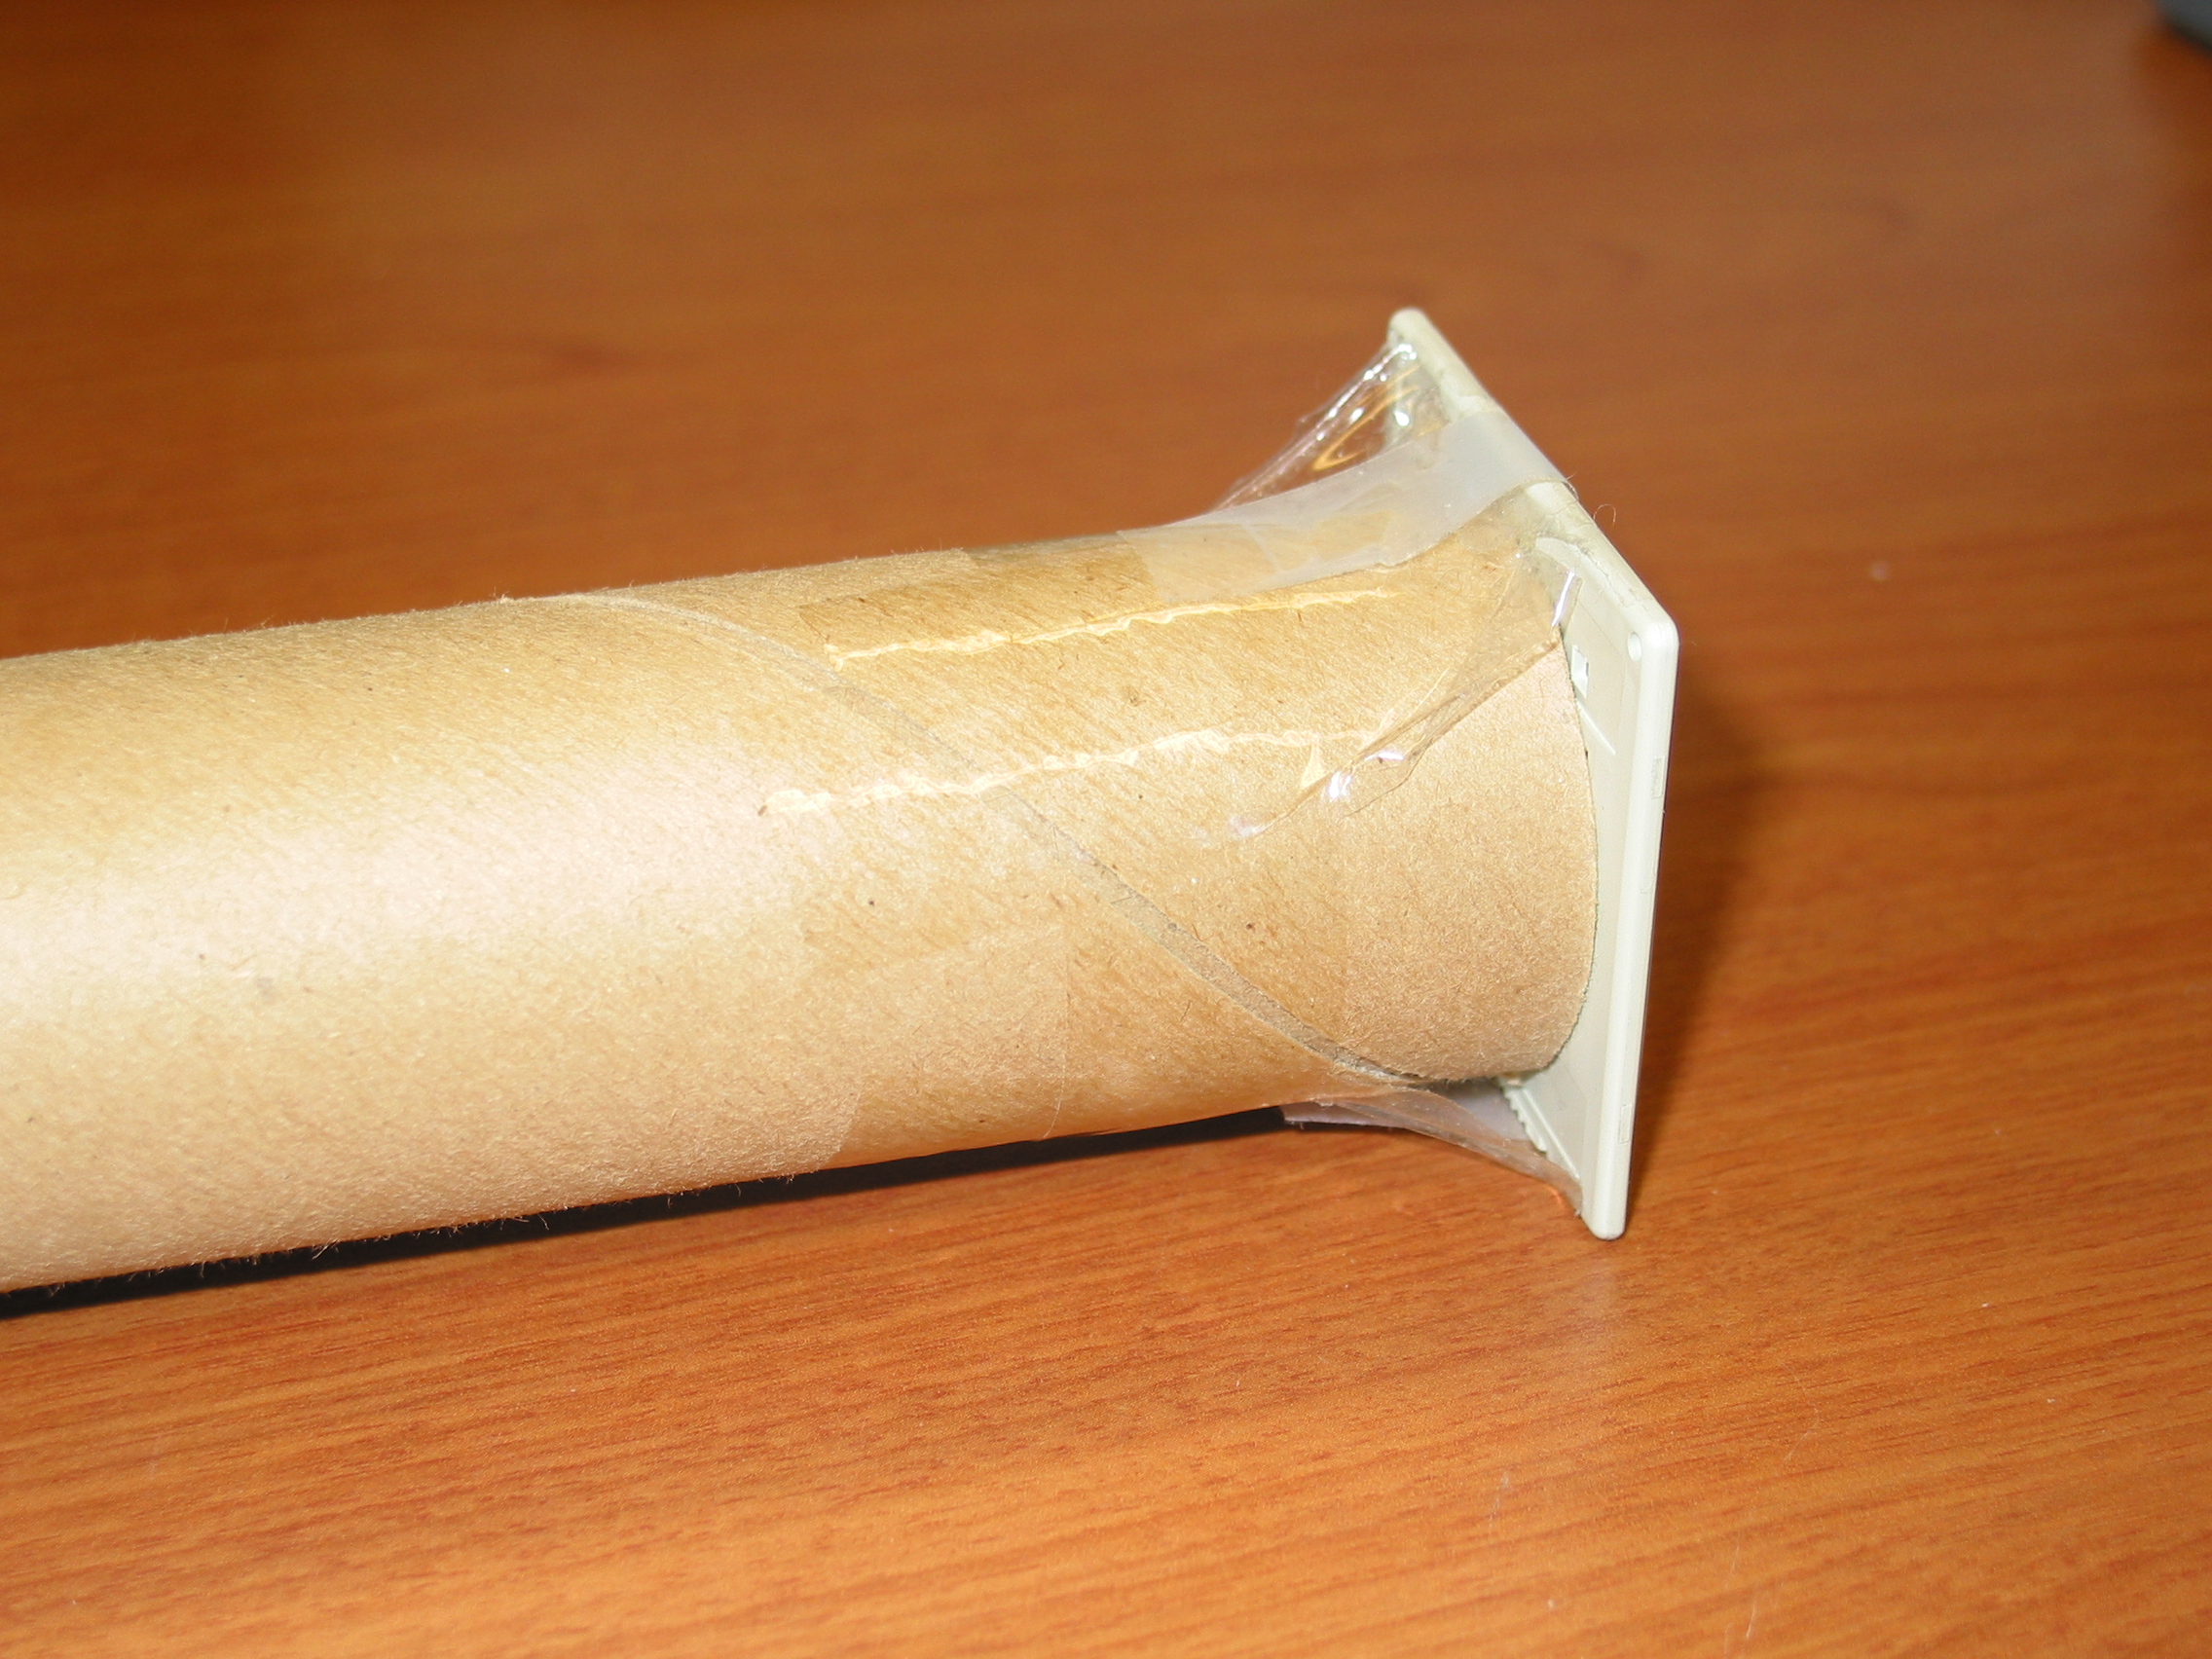
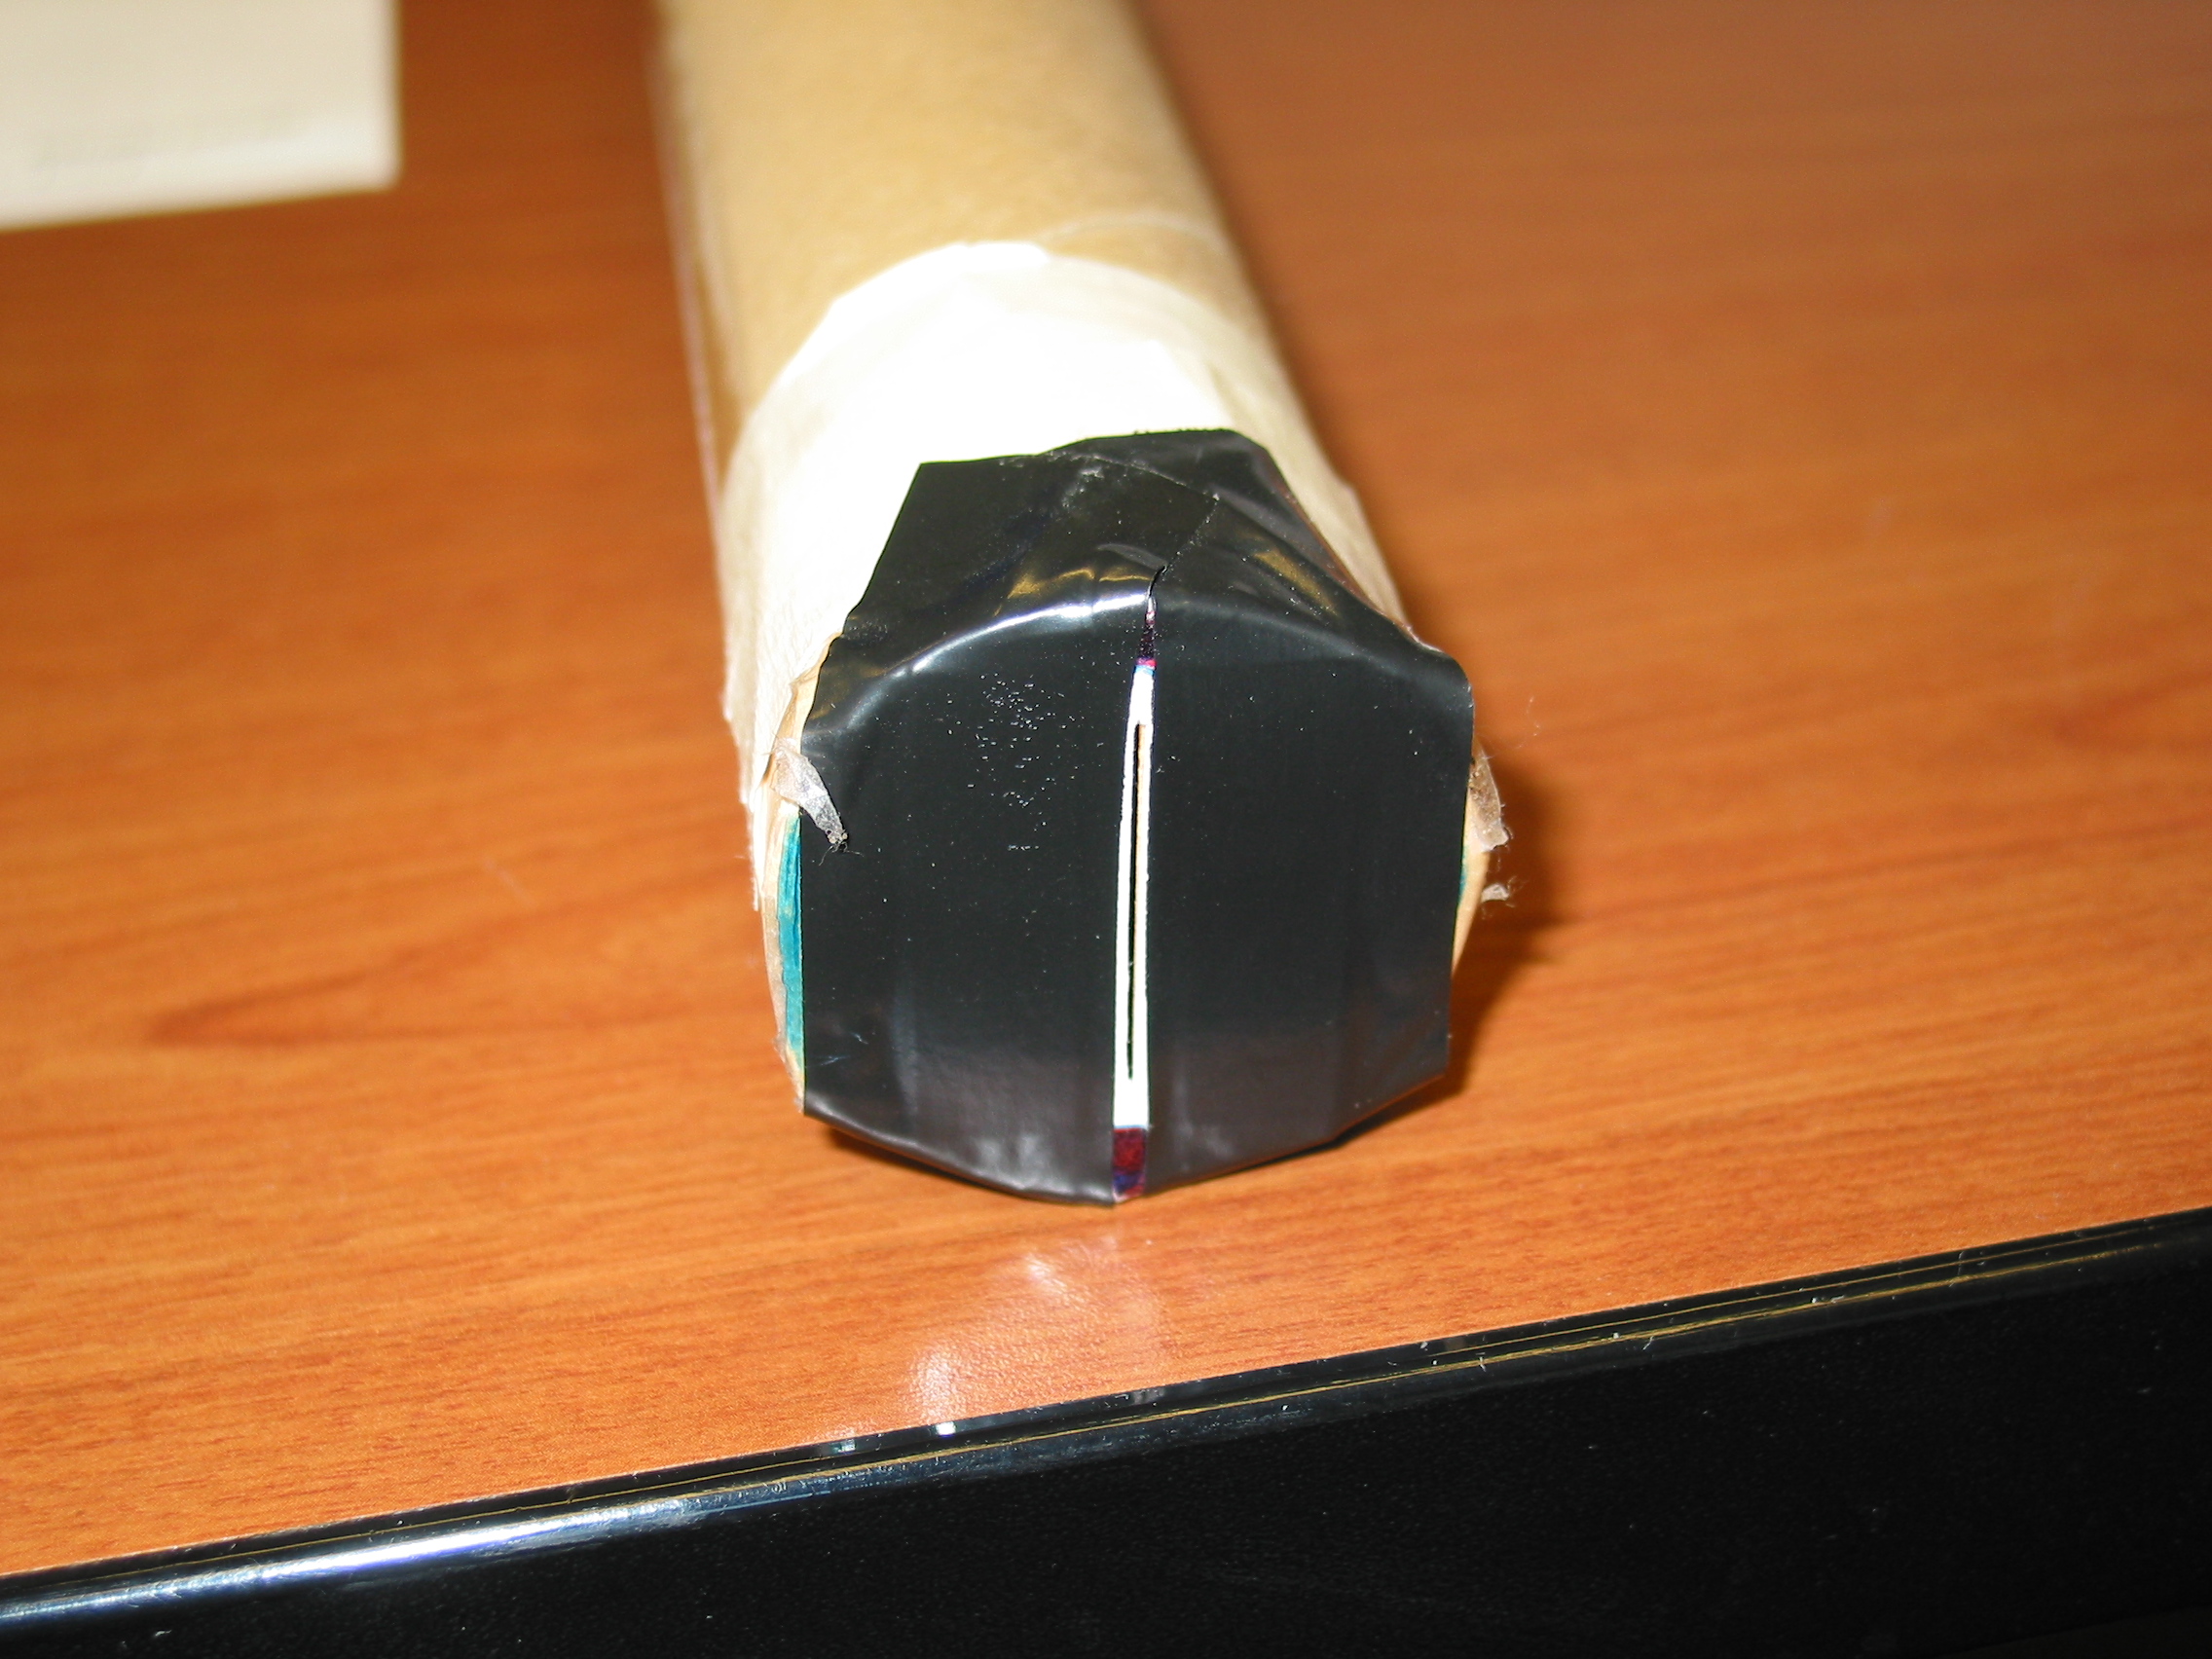
- Step 2
- Set the 3x5 card face down on a table, and place the open end of the
tube against it and with a pencil draw a circle around the tube on
the card.
- Place the 3x5 card onto the sheet of cardboard to protect the
table. In the middle of the circle you drew, cut slit 1-inch long
and 0.5mm wide in the paper, using a sharp razor knife and a metal
ruler to make the edges as clean as possible.
Note, this may require a few tries to get it right. My current
spectrograph took 3 cuttings before I got it clean enough.
- Cut out the circle with the slit
- Aligning the long axis of the slit with the *short* axis of the
grating, tape the slit to the open end of the tube, covering as
much of the aperture with black electrical tape.

- Finished spectrograph slit
Using the Spectrograph
WARNING!!!
NEVER, EVER POINT THE SPECTROGRAPH AT THE SUN!!!
THE SUN IS DANGEROUSLY BRIGHT, EVEN AT WAVELENGTHS YOU CANNOT
SEE, SO YOU COULD SERIOUSLY DAMAGE YOUR EYES.
To use the spectrograph, point the slit at a light source like an
incandescent light or a fluorescent light and look through the grating,
with your eye a few inches away from the grating. Align the slit up/down
with the source so you can see it clearly through the slit, then look
either to the left or right about 30 degrees, you'll see the spectrum of
the source.
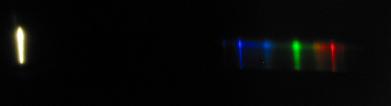
Examples of spectra (best pictures I could snap, I haven't designed a
proper camera rig for it yet) are attached:
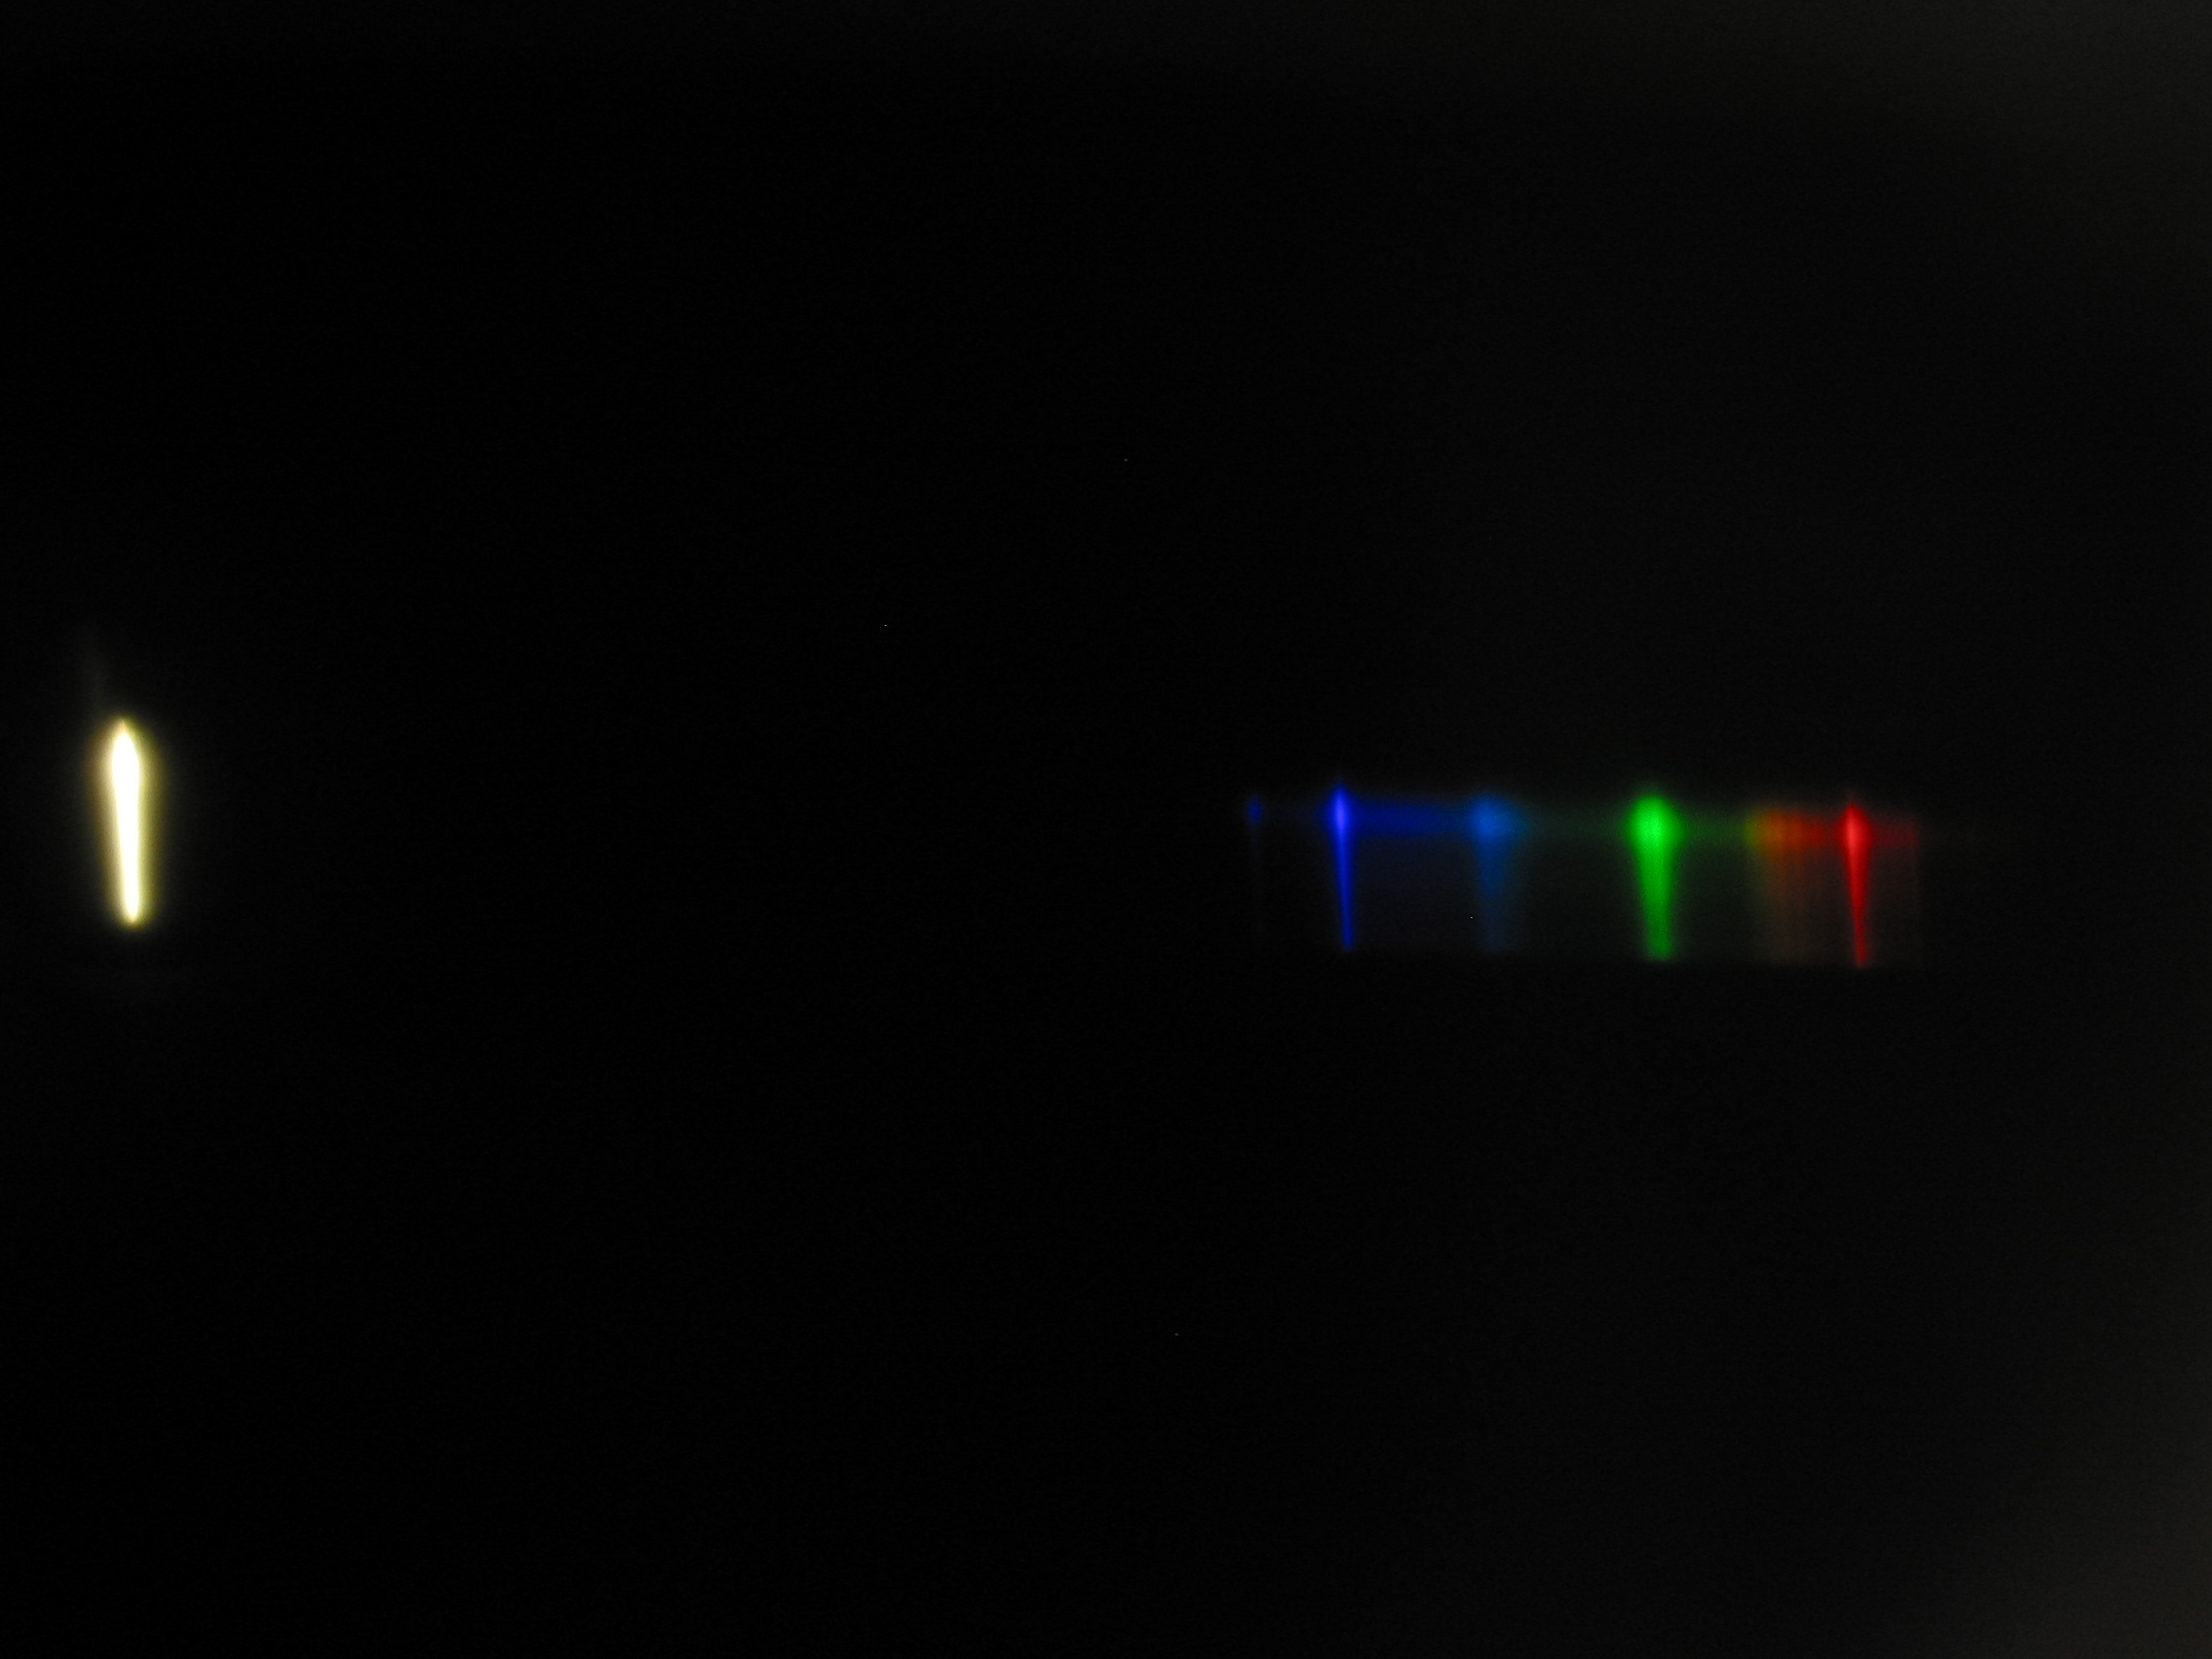
- Fluorescent Lamp
- Emission-line spectrum from a standard flourescent light fixture.
This shows the sharp, bright emission lines of Mercury plus broad bands
from the organic phosphors coating the inside of the tube.
[Details: The lamp is a Philips TL70 ALTO, a low-mercury lamp using
Philips' proprietary HI-VISION triphosphor coating.]
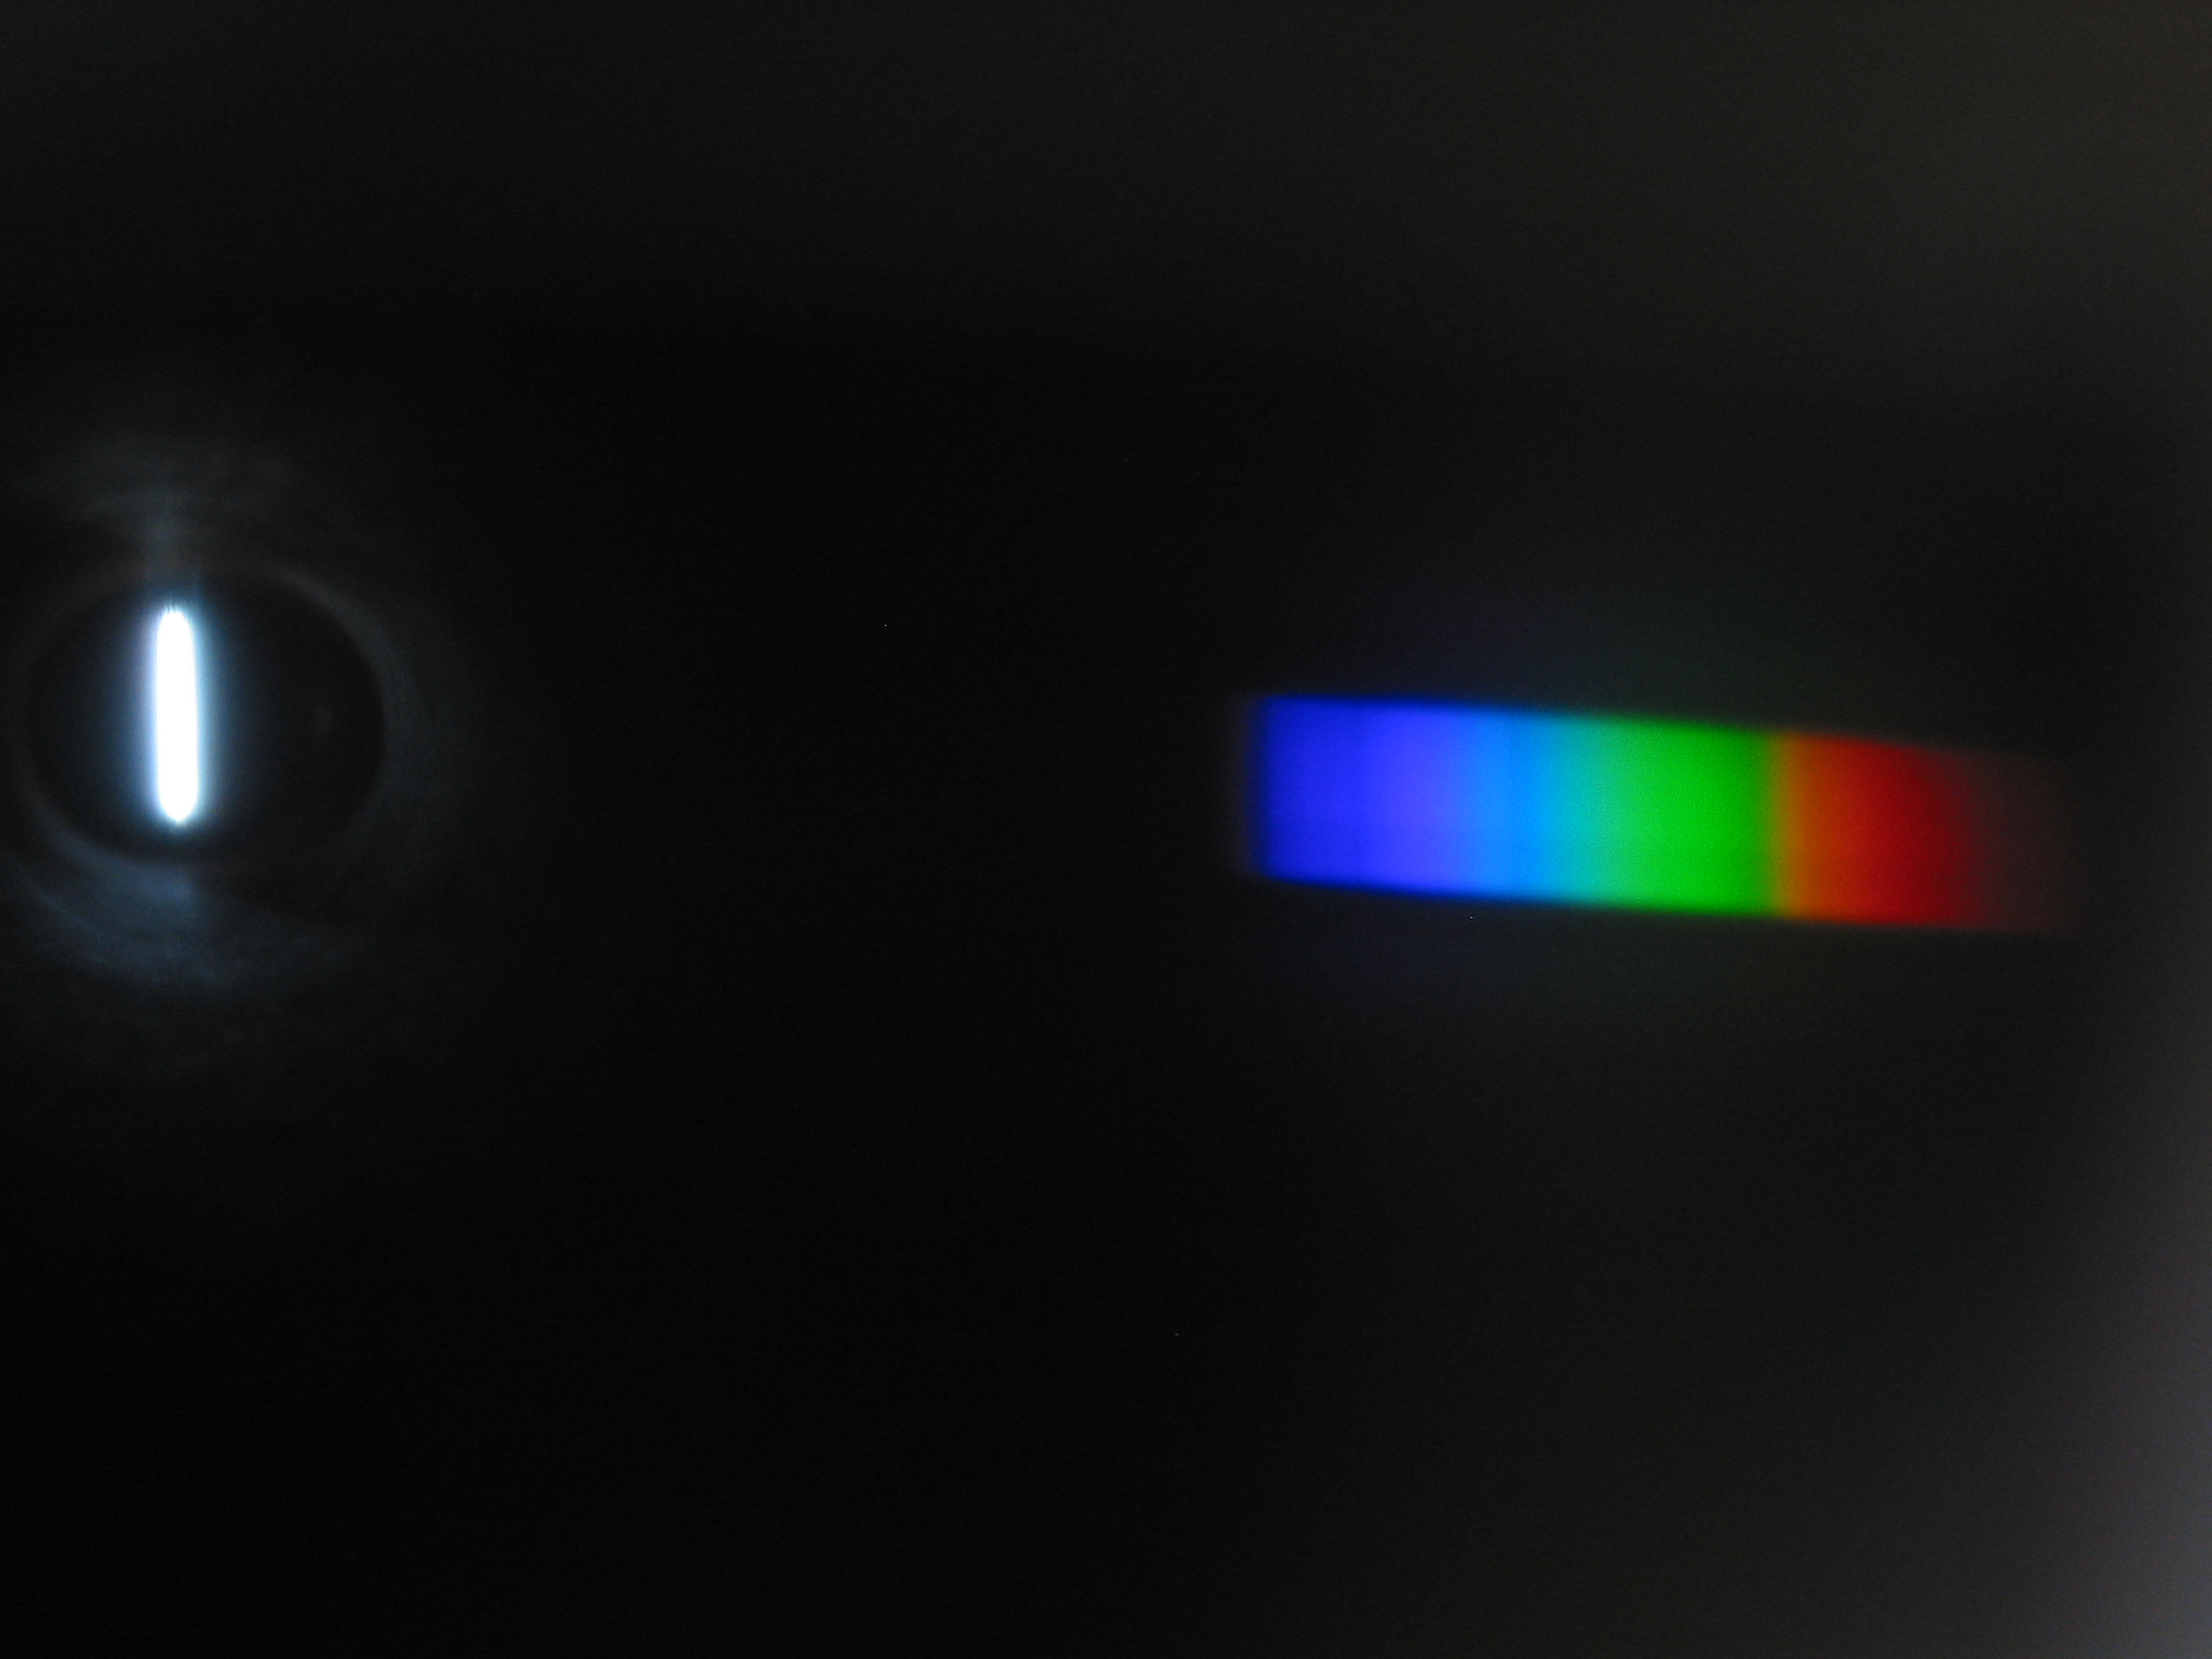
- Incandescent Lamp

- Continous spectrum emitted by a 100W incandescent light bulb,
showing a continuous spectrum from the hot tungsten filament.
[Details: The lamp is an Osram/Sylvania 60W/120V SoftWhite Incandescent
bulb with CC-8 Tungsten Filament. The "SoftWhite" coating is a thick coat
of white silica powder.]
- Street Lamps
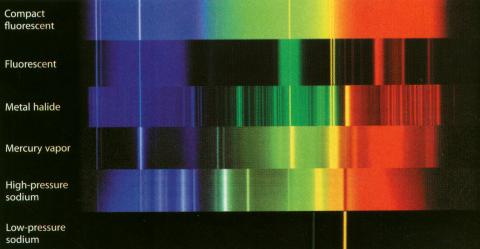
- Compare the spectra of streetlights that use
high-pressure sodium (HPS) and low-pressure sodium (LPS) lamps. HPS
lamps are found in many downtown areas, and appear whitish-yellow
in color and are very bright. LPS lamps are used in
mainly in residential areas where very bright lights are not needed,
they have a reddish-yellow color and are not as bright. LPS lamps also
tend to be long and thin, while HPS are round. The International Dark-Sky Association has
some online slides illustrating many aspects of light pollution
and light sources.
[Note: I have long since lost the original source of the
graphic above. If it is yours, please contact me so I can put on a
proper citation (or take it down if you do not want it posted on
this website.]
Other Sources of Light and Information
Try looking at neon signs of various colors, an LCD or CRT computer
monitor, a plasma or LCD TV, etc. What kinds of lines can you see?
- Representative
Emission-Line spectra of various elements
- Emission Spectra from various light sources. This is a
wonderful collection by
Ioannis Galidakis, including details on his double Amici prism
spectroscope.
- History, Science & Technology
of Light Sources by M.F. Gendre.
Again NEVER LOOK DIRECTLY AT THE SUN WITH THE SPECTROGRAPH! I can't
emphasize this enough.
Return to [
Unit 4 Index
|
Astronomy 161 Main Page
]
Updated: 2007 April 20
Copyright © Richard W. Pogge,
All Rights Reserved.